This is default featured slide 1 title

Go to Blogger edit html and find these sentences.Now replace these sentences with your own descriptions.

This is default featured slide 2 title

Go to Blogger edit html and find these sentences.Now replace these sentences with your own descriptions.

This is default featured slide 3 title

Go to Blogger edit html and find these sentences.Now replace these sentences with your own descriptions.

This is default featured slide 4 title

Go to Blogger edit html and find these sentences.Now replace these sentences with your own descriptions.

This is default featured slide 5 title

Go to Blogger edit html and find these sentences.Now replace these sentences with your own descriptions.

Sabtu, 28 September 2013

How to Configure DNS Server on Linux Debian 6

Now we will learn about how to set the dns on the server .
1 . The first step we have to set up the first interfacesnya > nano / etc / network / interfaces > and then type the script :
auto lo
iface lo inet lopback

allow- hotplug eth0
auto eth0
iface eth0 inet static
 address 192.168.40.2
 netmask 255.255.255.0
 network 192.168.40.0
 broadcast 192.168.40.255
 gateway 192.168.40.2

> after that press ctrl + o and enter and ctrl + x > and then restart it with the initial configuration script : / etc / init.d / networking restart > ifconfig to check ip
2 . The second step we install bind9 package , with the command : apt - get install bind9

3 . after installing we edit script from file " db.127 " with the command : nano db.127
let the sentences above . we need to edit is :
@ IN SOA ilma.net root.ilma.net . (
then edit it :
;
@ IN NS ilma.net .
2.40.168.192.in - addr.arpa . IN PTR ilma.net .
2.40.168.192.in - addr.arpa . IN PTR www.ilma.net .
2.40.168.192.in - addr.arpa . IN PTR mail.ilma.net .
2.40.168.192.in - addr.arpa . IN PTR ftp.ilma.net .
then we save
4 . then we go to the menu " db.local " , the command : nano db.local
we need to edit is :
@       IN SOA ilma.net . root.ilma.net . (
and the bottom
;
@       IN NS ilma.net .
@       IN A 192.168.40.2
www  IN A 192.168.40.2
mail    IN A 192.168.40.2
ftp      IN A 192.168.40.2
then we save
5 . further we get into the command : nano named.conf.local > ctrl - k first original script and then type the new script :
zone " ilma.net " in {
         type master ;
         file " etc / bind / db.local " ;
} ;
zone " 168.192.in - addr.arpa " in {
         type master ;
         file " etc / bind / db.local " ;
} ;
6 . that we have to edit this script now we edit resolv : nano / etc / resolv.conf
domain ilma.net
search  ilma.net
nameserver 192.168.40.2
then restart configuration : / etc/init.d/bind9 restart
7 . then type the command nslookup ilma.net
8 . Last test :
ping www.ilma.net
ping mail.ilma.net
ping ftp.ilma.net

so many tutorials about dns settings in debian 6 on my
may be useful :)

Selasa, 20 Agustus 2013

How To Configure Access Point D-Link


        This day, the first time I practice taking values ​​in class XII computer engineering and network.
Initially, I was scared because in my own accesspoint 8 groups of different. I was originally using a TP-Link,
but because I had not shared my end should be heartened to use the D-Link. As a result, I can still configure it. because it was not much different from other AP ... hehe, if my intermezzo too long???

   Phase I: LAN Configuration
1. Attach the Antenna, Cable Power adapter and LAN cable to the RJ-45 port on the AP.
2. Select the mode of use as AP (Access Point)
3. LAN cable to attach it to a computer or laptop. Wait a while.
4. Changing the IP address of your computer by step:
a. Right click on the network icon bottom right
b. Click the open network and sharing center
c. Change advanced settings
d. Double click on local area network and local area conection appears tables status
e. Click on properties and table emerging local area properties
f. Double click internet protocol vertion 4 (TCP/IPv4) appears tables vertion internet protocol 4 (TCP/IPv4) properties then set the IP on the NIC in a computer network 192.168.0.2 and subnetmask 255.255.255.0
g. ok

5. Open your web browser, then type the default IP http://192.168.0.1.
6. If successful, the login page will appear. Type in the User Name: admin, Password emptied, and the contents of the code and press the Log In button or press enter.
7. Wizard setup screen appears.
8. select the configuration manually.

Phase II: Configuring WIFI
The next step is to configure the wifi access. Select Wireless Setup menu on the left menu.
1. And then change the name of dlink on the Wireless Network Name into 05 groups. This name will become the name of the SSID on the AP.
2. Turning to the Wireless Security Mode. There are 4 modes of security that can be applied to the AP D-Link DAP-1150's, I chose WEP mode
3. Device Security Access Point. Type the password 12345abcde
then click save settings.


Senin, 12 Agustus 2013

Setting Up the Modem Cisco Router


First Stage Before Starting setup
For the first step setting Cisco Router, open your cisco, then attach the modem that has been prepared by the Astinet. Make sure the modem is supplied already on quality A. Also make sure the modem is also in accordance with the desired bandwidth demand.
Open the email or letter has been faxed by the Astinet and record the serial number and ip public ip given to you by the telecom side. For example given the following information:

    
serial ip: 192.168.53.55,
    
netmask: 255.255.255.252
    
public ip: 202 130 207 208
If the data is already there, it means your modem is ready. And that means you are able to configure your Rooter.
Common At The Stage Setting Router

    
Setting the IP address of the Ethernet
    
First thing to do is setting the IP address for FastEthernet it first. This is important because to simplify the process of setting the next step.
    
Connect Modem to Leaseline
    
Plug the modem into the router is leaseline, then plug in the blue console cable, to do configuration via pc. Of pc running hyperterminal to configure cisco router earlier.
    
Put Information Hostname, Password and other lainSetelah console cable attached, restart your router lah. The first time, booting Cisco will ask questions about the default initial configuration cisco like hostname, passwords, etc..
    
Initial configuration of Cisco Router settings
    
The first time we are doing is setting up a password console, aux, and vty passwords secret way is how:

    
router # config t
    
router (config) # enable secret (pass-you) router (config) # enable password (pass-you)

    
Further settings for the console, vty, and aux way:

    
router (config) # line console 0
    
router (config-line) # login
    
router (config-line) # password (your password) as well as setting vty and aux

    
Next do the settings again to let the current password in the password in encrypted sh run. and all passwords terencryption. How to do this is:
    
router (config) # service password-encryption
    
router (config) # enable password (your password)
    
router (config) # line vty 0 4
    
router (config-line) # login
    
router (config-line) # password (your pass)
    
router (config-line) # line con 0
    
router (config-line) # login
    
router (config-line) # password (your pass)
    
router (config-line) # exit
    
router (config) # no service password-encryption
    
router (config) # ^ Z
    
router (config) # wr mem
    
When finished setting the password, we can now change the hostname in a way:
    
router # config t
    
router (config) # hostname (your hostname)
    
router (config) # ^ Z
    
router (config) # wr mem
    
(Your hostname) #

   
if you need to set up the banner please set the banner on your cisco, here I did not enter because I think does not really matter.
Advanced Cisco Router Configuration Settings

    
Setting Against FastEthernet trouter fa0/0router # config (config) # int fa0/0router (config-if) # ip address 203 130 207 209 255.255.255.248router (config-if # ip address 192.168.100.1 255.255.255.0 secondaryrouter (config-if ) # ip nat inside
    
Against Serial settings Serial 0/0
    
router # config trouter (config) # int serial0/0router (config-if) # ip address 192.168.53.55 255.255.255.252router (config-if) # bandwidth 64router (config-if) # ip nat insiderouter (config-if) # ^ Zrouter # wr mem
    
Setting the IP Route
    
Setting the IP route in order to pass to the outside of the package anywhere via serial0 ip
    
router (config) # ip route 0.0.0.0 0.0.0.0 serial0 /
    
Setting IP Nat
    
Ip nat setting to perform Nat to internal network within a network using the ip nat. The trick pool advance to make public ip ready in natkan

    
router (config) # ip nat pool (pool name) 202 130 207 210 202 130 207 210 netmask 255.255.255.248
    
router (config) # ip nat inside source list 1 (name-pool) overload
    
router (config) # ^ Z
    
router # wr mem
    
Setting To Access List
    
router (config) # access-list 1 permit 192.168.100.0 0.0.0.255
    
router (config) # ^ Z
    
router # wr mem
After going through all the steps above, means that all the settings are finished to Astinet now you just try pinging the ip address on the internet when it is connected means your job successfully. And do not forget to set your client to Gateway on the existing private ip on your cisco router FastEthernet

Selasa, 30 Juli 2013

7 OSI Layers

7. Application Layerserve as application interfaces with network functionality, manage how applications can access the network and then generate an error message.
TCP / IP application layer is the Application. Application Layer has 8 protocol, namely:DHCP (Dynamic host configuration protocol): for IP distribution with a limited number of IP numbersDNS (domain name server): Database engine domain name and IP numbersFTP (File Transfer Protocol): A protocol for file transferHTTP (Hyper Text Transfer Protocol): A protocol to transfer HTML files and WebMIME (Multipurpose Internet mail extensions): protocol for sending binary files in text formNNTP (network news transfer protocol): protocol for receiving and sending news groupPOP (Post Office Protocol): A protocol to retrieve mail from the serverSMB (Server messages block): protocol for the transfer of DOS and Windows file servers
6 Presentation Layerserves to translate the data to be in tranmisikan by the application into a format that can be ditranmiskan through the network.
TCP / IP alpikasi, is the presentation layer. Presentation Layer 4 protocol that have:SMTP (Simple mail transfer protocol): protocol for the exchange of mailSNMP (Simple Network Management Protocol): A protocol for network managementTelnet: A protocol for remote accessTFTP (Trivial FTP): A protocol for file transfer
5 Session Layerserves to define how connections can be made maintained or destroyed.
TCP / IP alpikasi, Layer is session. Session Layer 3 protocol has:NETBIOS (Network basic input output system): BIOS standard networkRPC (remote procedure call): remote procedure callsSOCKET: Input outpu for BSD-UNIX network types
4 Transport Layerserves to break down the data into ppaket-data packets and provide the serial number for the packages that can be rearranged to the destination as it arrives.
TCP / IP Transport, Transport Layer is. Transport Layer 2 protocol has:TCP (Transmission Control Protocol): A protocol-oriented data exchange (conection oriented)UDP (user datagram protocol): Protocol data exchange non-orientation (Connectionless)
3 Network Layerserves to identify the IP addresses making headers for the packets and then routing through the internet router and switc working USING layer-3.
TCP / IP Network Layer is the Internet. Network Layer 4 protocol has:IP (Internet Protocol): A protocol for routing settle itRIP (Routing Information Protocol): Protocol to select the routingARP (address resolution protocol): Protocol to get the information right from the hardware IP numbersRARP (Reserve ARP): protocol to obtain the IP address of the hardware
2 Data Link Layerfunction to determine how the data bits are organized into a format called a Frame
TCP / IP Data Link, Network Interface Layer is. Data Link Layer is divided into two, namely:Data Link LLC PPP (Point to Point Protocol): A protocol for point to pointData Link MAC SLIP (Serial line internet protocol): Protocol by using a serial connection
 
1 Physical Layerserves to mendefinisakan network transmission media, signaling method, bit synchronization, network architecture, (such as ethernet or TokenRing), network topology and wiring.
TCP / IP Physical Layer with Data Link. Protocol for Physical Layer:Ethernet, FDDI, ISDN, ATM


How to Install and Configure FTP Server

The installation steps is:

Insert your installation DVD. First we will mengsintall package vsftpd ftp server ie
# Apt-get install vsftpd

After that, you will receive a confirmation message. Just hit enter to continue.
And the installation process will take place shortly.
After the installation is complete. Then we go to the configuration stage.

First we go to the etc directory
# Cd / etc /

Then we will edit the vsftpd.conf file that is in that directory.
# Vim vstpd.conf

Find words that named
anonymous_enable = YES

Replace YES with NO.

After that look again
# local_enable = YES

Remove the fence in front of him.

After that look again
# write_enable = YES

Remove the fence in front of him.

After that look again
# anon_upload_enable = YES

Remove the fence in front of him.

Then save your edits lah.
And then restart vsftpd
# / Etc / init.d / vsftpd restart

Once you've finished configuring, then the next step is to add a subdomain ftp to your domain record. First make sure you have installed and configure DNS servers.

Login to bind directory
# Cd / etc/bind9

Db file and then edit your domain
# Vim db.ujian

After that add
ftp IN CNAME ns1

If you have added records for ns1. Or if you get confused just use

ftp IN A 192.168.0.1

replace 192.168.0.1 with your server IP.

Then save and restart your bind9.
# / Etc/init.d/bind9 restart

Then you can access your ftp server with the domain ftp.domainanda.com. To log in, use the user accounts that exist on your server. If not there you can add a user with the command

# Adduser USERNAME

Kamis, 25 Juli 2013

How to Configure Access Point TP-LINK

1. First setting our AP IP 26.12.95.3 as the default state of TP-Link Wireless has address 26.12.95.2
2. Open the browser, in this case I'm using Mozilla, then input the IP address (address) of Wireless was the 26.12.95.2 into the browser address bar and then press enter.
3. Enter the username: admin and password: admin
 then it will appear the interface of Wireless TP-Link. Choose the menu Network> LAN enter the address as above then Subnet Mask: 255.255.255.0
4. TP-Link Wireless restart by choosing System Tools> Reboot then wait a while and then go to the TP-Link Wireless systems such as the initial step.
5. Then select >> wireless LAN access point mode select
6. Upon entry into the administrator interface, select menu and choose basic wireless settings and enter the following settings:
7. The next step is its wireless security settings so that the person entitled to use the connection, select the Wireless menu> security settings:
8. Next step is Mac Setup. Click the menu on the display as below. For only allow Setting for Mac is registered to be entered click on allow and vice versa.
9. Change the admin passsword
10. Save and Reboot for the TP-Link Wireless and ready for use
     

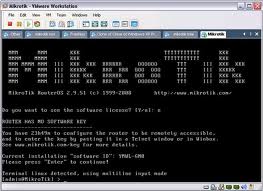
How to Configure Mikrotik RouterOS

Previously you should have installed a Mikrotik on your computer. after installation, please follow the following steps:

1.after installed properly execute your Mikrotik
2.enter default user password
username: admin
password: (blank) without a password
3. replace your ethernet name if you want, in which case you can give any name = [admin @ mikrotik]> interface
[admin @ mikrotik] interface> print (see first how many ethernet reply attached)
[admin @ mikrotik] interface> set 0 name = LAN
[admin @ mikrotik] interface> set 1 name = WAN
4. then added the ip addresses
[admin @ mikrotik]> ip address
[admin @ mikrotik] ip address> add address = 192.168.0.1/255.255.255.0 interface = LAN -> ip interface for local
[admin @ mikrotik] ip address> add address = 203.89.31.34/255.255.255.248 interface = WAN -> The global ip antecedent to get from ISP
5. then enter the gateway
[admin @ mikrotik]> ip route
[admin @ mikrotik] ip route> add gateway = 192.168.0.0/24/203.89.31.33 -> This is a gateway for exit
6. then setup a webproxy
[admin @ mikrotik]> ip web-proxy
[admin @ mikrotik] ip web-proxy> set enabled = yes
[admin @ mikrotik] ip web-proxy> set transparent-proxy = yes
[admin @ mikrotik] ip web-proxy> set max-object-size = 1200KiB
7. then add the rule so that the client will use port 80 on the web-proxy to shift gears
[admin @ mikrotik]> ip firewall nat
[admin @ mikrotik] ip firewall nat> add chain = dstnat protocol = tcp dst-port = 80 action = redirect to-ports = 3128
8. then input its dns
[admin @ mikrotik]> ip dns
[admin @ mikrotik] ip dns> set primary-dns = 203.130.208.18
[admin @ mikrotik] ip dns> set secondary-dns = 8.8.4.4
9. Now masqurade interface WAN
[admin @ mikrotik]> ip firewall nat
[admin @ mikrotik] ip firewall nat> add chain = srcnat action = masquerade src-address = 192.168.0.0/24 dst-address = 0.0.0.0 / 0

10. now try to ping the gateway and dns of proxy, if REPLY means is connect

      GOOD LUCK :)